Compost Worms, in this article you can learn everything you need to know about composting with worms. Let's star!
Before diving completely into this composting wormhole (pun intended), let's talk about a little of what is composting, which I'm sure you've heard since it has become really popular.
Composting in technical terms is the process of decomposing organic materials into simpler organic and inorganic compounds by microorganisms. It is the way nature recycles its own produce into food for itself. Which is called compost. Sounds cool right?
Even though it is a natural process that happens independently of the human hand, there are a few things we have to keep in mind if we do want to get involved.

First thing first, the garbage that ends up in the landfill will decompose. When we discard organic waste with other items that go to the landfill, they decompose anaerobically and release two main gases - methane (CH4) and carbon dioxide (CO2), both of which are greenhouse gases. If you’re not sure as to why these are harmful, this article highlights how the increase in greenhouse gases (GHG) is the main factor in climate change and global warming.
This is why it is so important for us to separate our waste and to start composting!
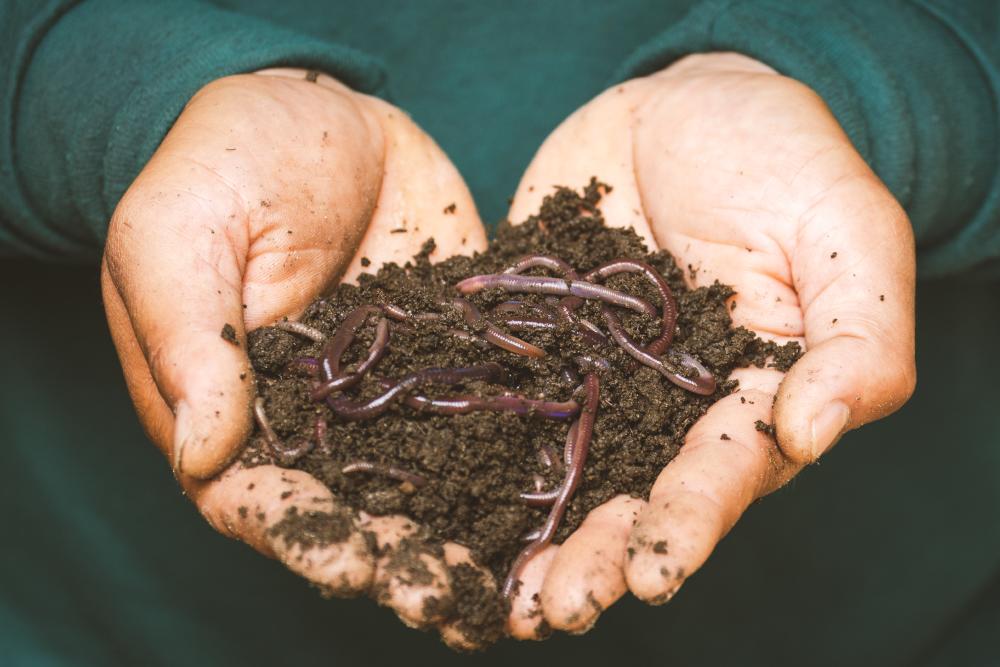
The type of composting technique that involves little invertebrates wiggly friends is called vermiculture.
This process involves cultivating worms that excrete vermicompost as they break down the material, awesome eco-friendly fertilization. Vermicompost is the result of vermicomposting.
This is basically the product of the work of compost worms working towards creating fluffy, nutritious compost.
Vermicompost contains water-soluble nutrients and is an excellent, nutrient-rich organic fertilizer and soil conditioner. It is mostly used in small-scale settings, such as an organic farm or a home garden.
There are a few benefits and different usage for the worm compost:
This sounds so perfect in every way possible, right?
Learn more about Vermiculture on this article: Vermiculture: How ti start with it and take care of your Worms
If you do things the right way, compost worms will be your best pals while gardening. And it is not only used in home gardens, I bet every other farmer from the Farmers Market are making good use of vermicompost. It is a natural solution to a big problem, food wastage.
There are three keys to success in setting up your bin: darkness, good ventilation, and drainage.

So the indoor bins are mostly made with plastic containers. Remember three keys, so you will need the bins to be black, dark blue, or dark green to make sure you have the perfect environment for your compost worms. You'll need to have a bin with holes (remember the second key?) for ventilation. You can buy pre-holed bins, or you can buy a regular one and drill holes on the sides. The trick is that those holes will let in the air and out the excess water, here comes key number three: drainage. In addition to the wholes in the walls of the plastic bins, you would have to drill some in the bottom to make sure the extra humidity grains out. Make sure you put a tray underneath so all that extra water doesn't make a mess in your home.
If you want to set up your worm bins outside, there are a few more options. You can use either a plastic bin or a wooden one, can even DIY it with recycled pallets, this time you won't have to drill anything since the wood on the pallets has little cracks, so easy peasy!
You will need some strong plastic though, so you can line the wood and punctured holes in it for drainage and airflow.
Like real estate, there is only now key for vermicomposting is location, location, location. Where do you decide to place your compost bin is very important. Even if it is inside your apartment you need to be mindful of the environment you are providing to the worms. So let's recap:

If you are planning to have it outside and you live in a very cold climate, the best thing you can do is either build a shed for protection in cold months or make it portable so you can move it inside during the winter.
It doesn't matter which approach you are taking, the preservation tricks are the same.
If you are interested in starting compost at home: Here is the complete Guide on how to Composting at Home.
Since compost worms are animals, they need a few things to survive. The most important ones are a good environment and food. So you need to make sure you prepare your compost bin for it to become their new house.
And what is cozier than a bed? So bedding is very important for maintaining a happy "wormhood". You can use a variety of things for the bedding: dry leaves, straw, paper, cardboard, or pieces of wood.
Now that we have a nice cozy bed for our compost worms, we add a little garden soil. This will help the worms move around. You should add enough water to make it humid enough so it resembles a wet sponge. Should be able to feel the humidity but not see puddles in the soil.
Once the mixture is perfect, you should add the worms, to make them feel at home dig a hole in the middle and carefully put the worms in. After that you just need to close the lid and of the bin and let them accommodate on their own for a few days. Then start putting in your organic materials.
Taking about this, this is a list of thing you can compost in vermicomposting:
It is a pretty simple process, to maintain the compost worms alive you just need to keep in mind what you are feeding them. Here is a video you might enjoy of a worm eating a banana and making it compost!
Now you know the power of the compost worms let's keep them healthy. Here is a list of common mistakes for you to avoid.
Feeding the worms the wrong food. Take into account that the more time the organic produce stays the more likely it is to release stink and damage the PH of the soil. Damaging the reproduction of the compost worms.
You should avoid feeding them processed food, oil, dairy in your composting bin to make sure this doesn't happen. Also keep in mind that acid is one of the worst enemies for your compost, so try to avoid big quantities of acidic fruits.
Excess humidity. This is a very common mistake among composters. You need to constantly regulate the humidity from the bedding. It is not that hard if you catch it in time, just add more soil and dry components to it until you get the perfect amount of humidity.
Not enough humidity: The opposite situation can also damage your compost worms. If the dirt gets too dry the worms will dehydrate.
Not harvesting worm castings, is a very common mistake among non-gardeners. This is the thing, all of the actual compost needs to be harvest to make room for the new casting. So even though you don't need the fertilizer put it in a bag and give it to someone with a big garden!
Harvesting it is not that hard, you just need to separate the casting from the worms and ta-da! That's your fertilizer right there.

Hot and cold climates: People often think that since the worms are in a box, they are protected from the shifting temperatures, but this is a mistake. If you live in a place where there are extreme conditions, either cold or hot, you need to be able to protect your compost worms from anything that can harm them.
Even though as they sound high maintenance, keeping your compost worms happy is not that hard. An even if you don't feel completely ready for this, you can start with a small bin so you have better control of the worm's environment.