Here is the complete guide on how to Composting at home, if you’re looking to get started with composting check this five simple steps!
")
Composting (a word you’ve probably heard before) in technical terms is the process of decomposing organic materials into simpler organic and inorganic compounds by microorganisms. Too much biology for you? Plainly said, it’s nature’s way of recycling.
Compost is, therefore, the product of this process (decomposed organic matter) which is usually used to fertilize gardens. It is earthy in texture and smell, and can also be described as “fluffy”.
...and why is composting important?
“Doesn’t organic waste just decompose and ‘compost’ in the trash with everything else?”
Well, not really.
When we discard organic waste (i.e. anything that was made from something living, or from something that was alive) with other items that go to landfill, they decompose anaerobically and release two main gases - methane (CH4) and carbon dioxide (CO2), both of which are greenhouse gases. If you’re not sure as to why these are harmful, this article highlights how the increase in greenhouse gases (GHG) is a main factor in climate change and global warming. According to the FAO, If food wastage were a country, it would be the third largest GHG emitting country in the world.
If you want to go deeper on the Compost definition, check this article: 3 keys to understanding the Compost Meaning and his universe
One of the ways we can help reduce contamination and GHG is using the Three R’s method, maybe you’ve heard of it?
In treating what we refer to as “waste”, the EPA built a hierarchy to illustrate the best and worst ways to deal with what we discard. This is where the Reduce, Reuse, Recycle waste management guidelines were born.
_17.32.06")
After reduction and reuse, composting (recycling) is the best way to deal with organic waste, and with our five simple steps, you can also be doing your part to help the planet stay cool.
Click here for more: Reduce, Reuse & Recycle: What does it Mean, How to put it in Motion
Let’s talk about different (small scale) processes you can choose from:
Vermiculture is probably the type of composting that first came to mind when reading this article - the one that uses squiggly friends to break down organic waste. This process involves cultivating worms that excrete vermicompost as they break down the material, an awesome eco-friendly fertilizer.

Hold up.
You’re telling me you don’t need worms to compost?
Yup! :D
If you happen to be squeamish, keep reading to learn about different options that don’t involve having a box full of these guys sitting cozy at your house.
Here are some of our great articles where you can start:
According to Wikipedia, the term Bokashi is a Japanese word that means “fermented organic matter.”
Bokashi is quickly becoming a popular option, since it allows for all food scraps to be decomposed and turned into compost in 10-12 days. How? The food scraps get mixed with inoculated Bokashi bran, pressed into the Bokashi bucket, covered with another handful of bran, and tightly covered. This is a great choice if you’re more the anxious type and have some extra dollars to spend on the Bokashi bucket and bran.
You may be interested in: Bokashi composting: all you need to know about a fancy way of composting.
And once you're ready, you can also check the following post: How to Choose the Perfect Bokashi Composting Starter Kit for You!

This style is the easiest, cheapest and fastest. In direct composting, you’re essentially piling different elements on top of each other and allowing for the aerobic decomposition process to take place. This is the style we will be covering in this article.
More info here: Outdoor Composting 101: Basics and Features to Get you Started
_17.22.06")
The following three things (when well-managed) will be the measure of success for your compost:
There’s a couple options to choose from to create your compost site, ranging from “naked” (just piling your waste and scraps somewhere in your backyard, without a container) to swankier set ups. The main difference between these alternatives is that setting up your compost in a container means a year-round compost output, whereas a naked set up will mean that the process gets naturally paused during the colder seasons.
If you’re handy and know your way around power tools, you can also DIY with a couple of cheap items like pallets: DIY! 5 Simple Steps to Build your own Compost Bin from Pallets. The choice is yours!
Things to consider when deciding where to place your compost site:
Composting, while great for the environment, is a smelly process. Consider placing your site somewhere ventilated and away from where you would usually be hanging out in your house.
Avoid leaving your bin in direct sunlight, as it could cause fermentation of the material as well as dryness, which would decrease decomposition and ruin the process. More info here: Smelly Compost? How to Control Bad Smell on Your Compost
If your compost site will be outdoors and on the ground, try to avoid placing it too close to trees since they might root into it and ruin the process.
Read our next article to find out how to troubleshoot the main issues your composting site can present: Compost problems and how to avoid them.
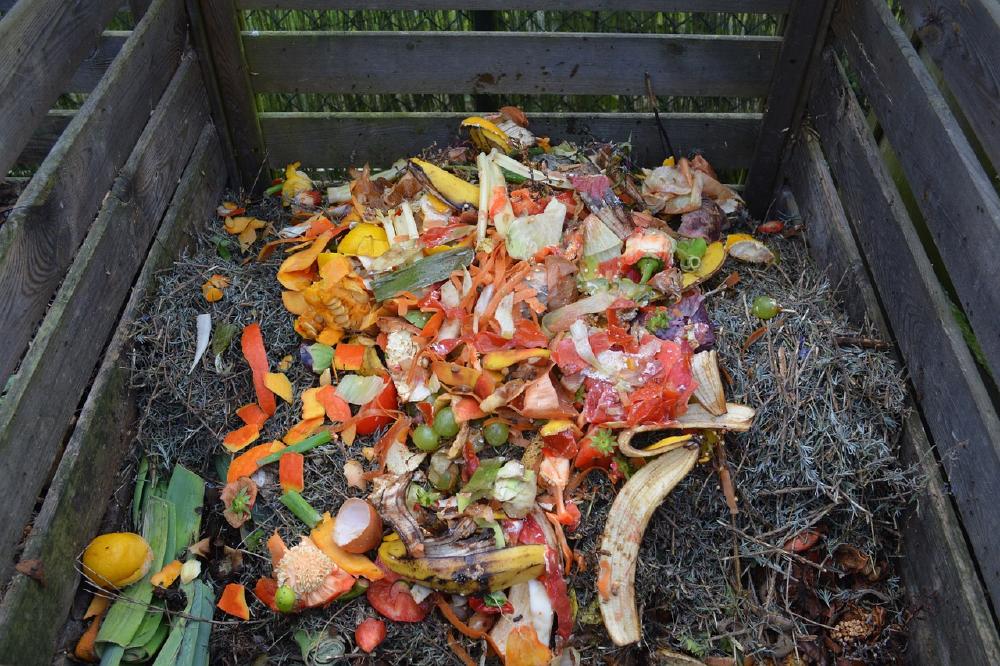
First off, piling scraps and organic waste can’t be done willy-nilly. Different elements will decompose at different rates and there is a specific order to correctly layer your waste.
This will mean that you might have to store some scraps in the freezer (because who wants a smelly kitchen?) in order to later add to the pile.
So, what’s the correct layering order?
The nerdy explanation is to combine wastes that have a high concentration of nitrogen and carbon with others with low concentrations, as well as mixing elements with slow decomposition rates with others that have a much higher speed.
… what?
Easy.
Greens are materials rich in nitrogen such as leaves, grass, and food scraps.
Browns are more woody materials rich in carbon-like stalks, paper and wood chips.
Find out more here: The Perfect Compost Ratio: Greens to Brown Balance

When you’re layering, remember that green material is usually wet, while brown is mostly dry. You’ll want the wet elements piled on top of the dry ones. Brown material helps aerate the mixture, allowing drainage. Otherwise, you’ll just end up with a soggy, damp, smelly mess.
Please note, it is pretty much impossible for this process to take place without generating slightly unpleasant odors, but by layering the leaves, most of the smells will be trapped here.
Keep adding layers of browns and greens - how many layers of each will depend on your compost space and the amount of food scraps. As a rule of thumb, each layer should be around an inch; and you want to have at least twice as many browns as you have greens, to help in keeping the humidity levels balanced. If you want to keep the ratio exactly, use this calculator to help figure out quantities of each element.
Here’s a list of items you may add to your compost bin:
There are more items you can also add to your pile, check them here: A Complete List of Things You Can Compost
Important note: some containers and products say “compostable” on them, but that only means through industrial processes - your poor, hard working worms are probably not going to cut it.
To know more items that cannot be composted, check the following article: A Complete List of What Items Cannot Be Composted
Now that you have all the information about what can be composted and what cannot be composted, learn: How to make a Compost Pile? All you need to know about it
Once the pile is ready, it’s important to continue adding to it with new organic waste - much of what you put in there will lose mass in liquid or gas form. To help the decomposition process, we also recommend that you cut and crush your organic waste.
You also want to keep your mixture aerated, so moving it around with a stick/pitchfork every 7 to 10 days is recommended (unless you’re doing vermicomposting, in which case the worms will be doing the aerating for you). If you seem some steam coming out of the mixture, don’t worry! That’s a completely normal part of the decomposition process.
Also, you should avoid adding too much extra water. Avoiding excess humidity is crucial to the success of your compost.
Pro tip: Kefir bacteria is an excellent aid for composting. The huge variety of microorganisms found in kefir are also capable of breaking down other organic compounds.
When is Compost Finished? Become an Expert with these Advices
Through vermiculture and direct composting, you should have usable compost in anywhere from two to four months. One of the main signs that you should be looking for is smell (or rather, lack of unpleasant smell). When the decomposition process is over and the compost is ready to be used, you should notice a “forest”, earth-y smell.
In addition, you shouldn’t be able to see plant remains or any initial material, everything should be uniform and mostly brown, and keep a room temperature.
Other than maintaining your garden, here’s a handy guide to check out more ideas for what to do with all your fluffy, earthy compost: How to use Compost? A complete guide to take advantage of compost benefits
So, are you ready to try it and be a Compost Warrior?!
