One of the best ways to start dropping our carbon footprint and reduce our waste is composting. It let us reuse our own waste and turn it into an organic fertilizer while we return the nutrients from the scraps to the soil and plants. There are different kind of composts and one of the favorites is vermiculture or vermicompost. Vermiculture basically uses compost worms to accelerate the decomposing process. Let´s find out more about how to start vermicomposting!
Vermiculture is defined as the controlled growing of worms in a particular type of structure. This structure might be used for different purposes but if what we are looking to achieve is to create Compost, we should be aware that it is not any kind of worm that we want to grow. In order to do Vermicomposting, we would need to grow red wiggler worms. This type of funny worms are the best at their jobs: decomposing waste and plants and turning it into a nutrient filled compost to enhance your plants and garden.

Vermiculture includes the use of a special container to grow the worms that we will call wormery from now on. As if it was a regular composting bin, a wormery need to be filled up with the same amount of green and brown components. What does this mean? For those new into composting, there is one basic rule for the compost to be successful: balancing your greens and browns. When we speak of greens, we mean all that organic waste such as food scraps that emits lots of nitrogen when rot, on the other hand we call browns to any material like leaves and branches that emit carbon when decomposing. This balance between greens and browns will be achieved by the right amount of moist (water) and in this case, worms will be used to help in the decomposing process.
There are other ways of composting and you can learn all about it in The Complete Guide on How to Composting at Home.
In vermiculture worms can help speed up the decomposing process by helping break up the scraps. How does this work? Worms eat the matter and while doing so they create tunnels that will be used as a kind of ventilators helping the aerobic decomposition. Imagine the worms as if they were laborers creating air pipes through your compost. On the other hand, worms as all beings also poop, and this excrement is used as a soil amender because of it high levels of nutrients.
You can have an idea of how the worms help in the decomposing process by having a quick look to this video:
A wormery can be set up in any small or big place as long as it is located under the right conditions for worms. Even if you have no backyard, a wormery can be placed inside as well. You really need to keep in mind that worms are animals, and they need to be respected and live properly while in the wormery.
Now that we know what vermiculture is, we are ready to start our own vermicomposting!
If you have already decided that you want to start vermicomposting the first question that you would need to answer is: Do I want to build my own wormery or buy it? Even though there are lots of options online, we want our wormery to be the best home for our worms, otherwise they might become sad or uncomfortable and try to escape or, worst case scenario, they die.
As in any other composting type, we need to maintain the right amount of air flowing. This will help the decomposing process and keep your worms happy and alive. An extra eye needs to be kept at the temperature as well, we don´t want the wormery to bee too hot or cold. Also, we need to keep it moist and dark.
Another thing to keep in mind when choosing the wormery is that if we decide to build it ourselves, the wormery needs to be easy to access without damaging the worms. An easy to open lid is essential, as well as a proper draining system. The wormery needs to be moisturized but not completely wet. Also, it might be significant to build up two different sections on the wormery. What do I mean by this? Once your compost is done and the worms have finished their job it might be good to separate that compost through an inner holed lid to start placing new scraps. This way the worms will slowly move from one section of the bin to the other one leaving your compost worm free and ready to use.
")
Last, you might need to choose the size of your wormery. It will depend on whether you are single or live among more people as the amount of waste produced is different in each case. Another factor would be the kind of diet that you carry, probably you will generate more organic waste if you are vegan or carry a plant based diet.
Once you have chosen your wormery, the next question that might arise would be: Where do I place it? The key here is that you need to take care of your worms, then place the wormery in an appropriate space for them. Worms love mild temperature; this means 50 to 77 °F degrees. Below this temperature your worms might still work but not as efficient as they should. While you should never place the wormery under direct sunlight as it might get to hot. My recommendation is to place the compos bin either inside a cupboard or in a garage, where it will be kept away from hot or cold temperature.
Also, place it somewhere that becomes easy for you to chop out your waste. For example, if you decide to put your wormery in a shed far away from the house it is probably that you won´t pay as much attention to it as if you place it closer to your kitchen.
There are different types of worms all around the world but the ones that we will be focusing on getting are called Tiger worms or Red Wigglers. As odd as it might sound you can easily get these worms online and delivered to you home.
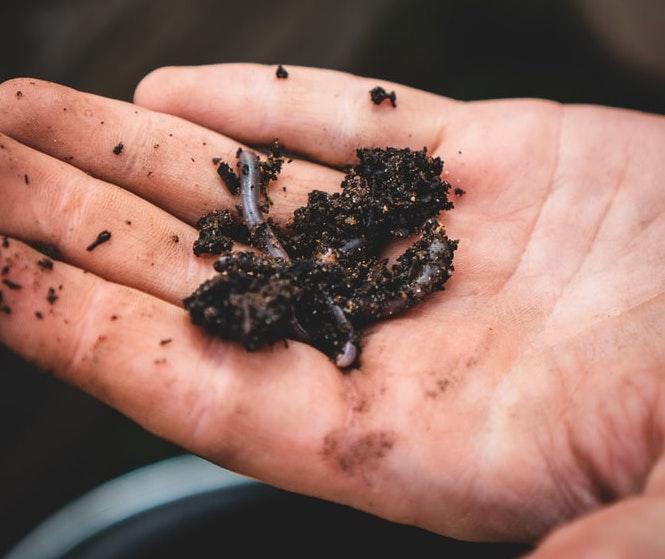
 Worms are used to accelerate decomposing process. Photo by pexels.
Once your worms have arrived, they will reproduce in your wormery, if you get them the proper conditions, and within three months you might have double the population that you ordered. But how much should I order? You might ask. Well, normally you can get started by 500 grams of worms and this might be able to fit an average worm compost bin. It is best to start with this amount so you can easily double it up.
As soon as your worms arrive, you can start preparing the wormery for them. First thing to do is create a bed of at least eight inches for your worms, you can do this with garden compost. An extra shredded newspaper and carton could be added too. The next thing that you need to do is moisturize this bedding as worms are not likely to survive in dry places. Once this is all settle you are ready to start filling it up with scraps!
One of the main issues people find around vermiculture is an excess of moisture on the wormery. This over moist bin could be cause by three different reasons:
Sometimes people reported that their worms were trying to escape the bin, and as hilarious as it might sound it is a fact! If the worms are not comfortable in their environment, they will try to find a better place to live. This is also caused by either an excess of moisture of the lack of it, so keep an eye on your wormery and keep your worms healthy and alive.
Pay attention also to the amount of light that you compost bin is receiving and the type of scraps that you are feeding them with. Lots of lemons or tangerines might turn your compost acid and affect the worms. You can try removing the last scraps that you added or covering it from light.
Find out more on our article: Compost Worms: Everything You Need to Know About Composting With Worms.
You are ready now to start your own vermicompost and let us know how it goes!
